Pages

Sunday, March 27, 2016

Comparing School-Based (Internal) and External Open-source Projects

This post is written for the purpose of fulfilling requirement for the Facebook Open Academy course I take in NUS.
For almost one semester now, I have been working on two open-source projects that are quite different in nature. The first one is an open-source project being used by developers who wanted to use WebSocket in their web application, and maintained by a handful of developers from different parts of the world; Socket.IO. The other one is also an open-source project, but it is being developed mainly by students (and a large number of them in certain period), and with lesser variety (and probably quantity as well) of users; PowerPointLabs.

Organization

Being school-based project, I found PowerPointLabs to be more organized in the way it writes the guide for contributing. This does not come as a surprise, as most of the developers are actually students who have little or no prior experience contributing to an open-source project. In contrast, guide for contributing to Socket.IO is practically non-existent; the only guide they provided in the website is the guide on how to use the Socket.IO itself, not how to contribute to it. This is also very normal because being a library, most developers who visit the website/Github page are probably intending to use the library instead of contributing to it.

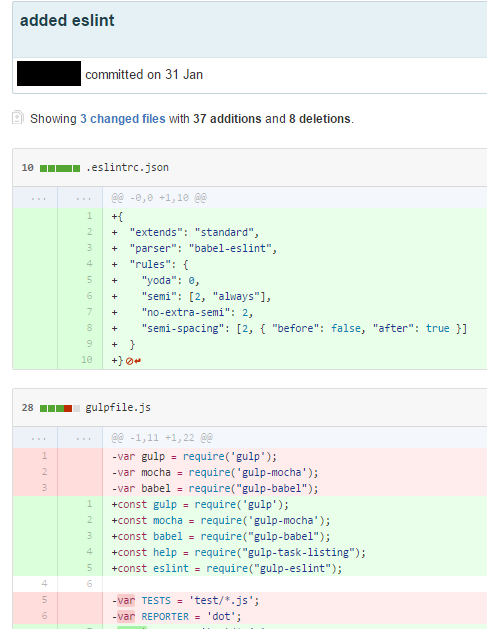
Also, getting Pull Requests to be merged into school-based open-source project is somewhat more difficult than getting the same done in external projects. This is because for the school-based one, strict review is carried out to instil good coding practice to the students. On the other hand, most open-source project out there are not very particular about coding practice, as long as it is not detrimental to the functionalities of the project. Moreover, most people who contributed to crucial parts of the project are most probably experienced developers anyway so there is no need to have such a strict review system. If the project owner/maintainer is particular about certain coding standards, he/she can always incorporate linting to the project (which is what I did for the course).

Ease of Contributing

Ease of contributing is not quite the same as ease of getting pull request to be merged; ease of contributing here refers to having something to contribute upon in the first place.

Contributing to internal open-source projects are easy. This is because the projects are there with exactly that purpose; for students to contribute to it.

Contributing to external open-source projects are much more difficult as most of such projects are already mature. Usually contributions from external developers (not the project's core team) is in the form of bugfixes, which is arguably more difficult to do than implementing new features for internal projects. This is because the developers of the external open-source projects are usually experienced developers and thus bugs in their code are usually mistakes that can not be easily fixed.

This is in contrast to internal projects where non-critical bugs are left on purpose so that the students can familiarize themselves with the code base; there is no such a thing in external open-source projects.

Rate of Development

Most open-source projects out there usually have a relatively longer release cycle compared to school-based open-source projects. This is because most open-source project contributors have full-time jobs or other commitments, and thus cannot afford to work on the open-source project full time. This sometimes results in long outstanding pull requests (especially if it is not a critical bugfix). Also, the project's main developers come from different parts of the world, and thus the different time zones the different developers live in may impact the rate of development as different developers are awake on different timings.

On the other hand, students may be considered as working on the project full-time and thus the release cycle tends to be much shorter, and I have yet to encounter an unattended long, outstanding pull request in PowerPointLabs or any other NUS projects unless if it is the student sending the pull request ignoring the feedback from the core developer team.

Suggestions for Improvement

There is always a room for improvements, be it for the internal school-based projects or the external ones.

For the external projects, it may be good to have more than one person to be in-charge of a project so as to prevent long outstanding pull request if the person in-charge is busy with other commitments. This is especially important if the project is listed on university programmes such as Facebook Open Academy or Google Summer of Code, when the rate of development will increase tremendously due to the extra manpower during the period.

For the internal projects, I feel that there is not much suggestion I can provide in terms of workflow; I think the current workflow works well to serve its purpose. However, I have the feeling that school-based projects have features that is not very well-polished. It could be better to focus the effort on polishing existing features first before implementing new ones. I think doing a product that do a few things but doing it well is better than a product that can do a lot of things but not good at any of it.

Conclusion and Closing

In conclusion, I think internal (school-based) open-source projects are much more organized in terms of contribution guide, are easier to contribute to, and are faster in release cycle than external open-source projects. External projects can do better by having multiple people in charge of the development so that they can fill in the other person if he/she is busy with other commitments. Internal projects may try to focus more on polishing existing features, which I think is the better approach, instead of keep releasing new features.

Sunday, March 20, 2016

Git vs Mercurial workflow: History, Commit, and Branching

This is going to be another Git vs Mercurial post, which is already widely available on the cyberspace (thisthisthis… I can go on) but I am writing another one nevertheless because I feel that many of such posts are written with so much hatred (especially those that is in favour of Git, unfortunately). So this post is going to be one of those Git vs Hg post where the author is in favour of Git but not trying to bash Mercurial (too hard, hopefully). Also, I am going to focus on the similarity and difference in workflow instead of functionalities, though differences in workflow will inevitably also bring about some differences in features into the discussion, but I will try to minimize it.
Note: This post assumes some basic knowledge of Git and Mercurial commands.

Attitude towards commit/changeset history

In Mercurial, history are “sacred” and not to be manipulated. The only command that a user can do out-of-the-box that can edit history is only hg revert, which only removes the last changeset. To manipulate further down the history, Mercurial extensions are available, but they are tedious to use and confusing at best (speaking from my experience using Mercurial on a project 2 years ago). For Git users like myself, this is a huge annoyance as we are used to “fixing” history to make it look nicer and more easily traceable in the future.
Git, on the other hand, allows users to manipulate commit history to their hearts’ content. In fact, it seems to be encouraged, evident from how easy it is to do so (git rebasegit rebase -igit push -f, and many other relatively short commands that changes history). This allows the creation of a better-looking, more linear commit history. However, inexperienced user may break the entire repo with it. Luckily, Git keeps track of everything and one can go back to the exact state before the accident happened (provided it didn’t happen more than a month ago; plenty of time to realize something bad has happened, if you ask me).

Commit workflow

In Git, there are 4 states a file can be in; untracked, unstaged, staged, and committed. To move a file (or more precisely, a change/modification) from untracked or unstaged to the staged state, use git addand to move to the committed stage, use git commit.
In comparison, in Mercurial there are only 3 states; untracked, uncommitted and committed. To move a file from untracked to uncommitted, use hg add and to commit use hg commit.
The difference here is that in Git, the user can choose not to commit all changes in the working directory (using git add <filename> or git add --patch, for example). This is useful to make a commit atomic (which is part of Git’s or any version control system’s best practices), or if you have finished work in some files but not in others. In contrast, in Mercurial, there is no staging state and hg commitautomatically commits all changes in the working directory. If you came from Git background like myself, you will find yourself repeatedly committing unfinished work, and what’s worse, it is difficult to fix the messy history due to that mistake! That was the pain I personally went through in the Mercurial project I worked on 2 years ago.
There are Mercurial extension that mimics this Git behavior, but I have not used it personally so I cannot comment on it. However, from what I have found on the Internet, it seems to be a decent replacement for users coming from Git background using Mercurial.

Branching

In Git, there is only one way to branch (though there are a few commands to create a new branch but that’s beside the point). Any divergence in commit history is a branch, and the name of the branch is namespaced according to which repository the branch originates from.
For example, if I have a branch called test which tracks a remote branch with the same name, if at some point in time my local branch and the remote branch diverges, when it is being merged, the remote one will be called remote/test. There is no other “branching” method.
In Mercurial, there are at least 3 ways of branching.
The first one is a clone-branch. This seems to be the initially-intended branching workflow of Mercurial, evident from the “local-cloning-optimization” feature they have called “hardlink” which makes cloning from a local repo faster. This, however, is not a feasible branching workflow for certain types of projects where dependencies need to be downloaded separately (through npm or pip, for example) for each repo.
The second branching workflow that Mercurial supports is called named-branch. It is quite similar to Git branch in that one can update (or checkout in Git terminology) to the latest commit on that branch. In Mercurial, however, named-branch is not a light-weight pointer to a HEAD just like in Git, but is something that is included in a changeset’s (or commit, in Git terminology) meta-data. There are some implications that people from Git’s world don’t really like (such as cluttering the revision history with short-lived branches and needing to “close” a branch with an extranous commit). On the other hand, it could be useful when tracing the history. But then again I have worked with Git for quite a while and I have never encountered a problem where I need to know the name of the branch a commit was from, so the usefulness is questionable.
The last branching workflow that Mercurial has is bookmarks. This is (claimed to be) the Git-branching equivalent in Mercurial. However, having used it in one of my projects 2 years ago, I find that they are not quite the same. In fact, I find that Mercurial’s named branch is more similar to Git branch than Mercurial bookmark is simiar to Git branch. In Git, you are always working on a branch, so whenever you commit, you commit to a branch and other people who pull your work knows that your commit belong to a certain branch. In contrast, you are not always on a bookmark in Mercurial, and thus people may accidentally committed when he is not on a bookmark, requiring the user to manually move thebookmark to the intended changeset. Also, when sending a pull request, the name of the bookmark is not shown. Instead, the hash of the changeset is written as the “branch name”. This makes me doubt the claim that bookmark is really the Mercurial equivalent of Git branch.
Arguably, there is another Mercurial branching workflow, which is simply not to do anything about it. If there is a divergence from a certain changeset, simply don’t do anything about it. Users can refer to a “branch” by the hash or revision number of the tip of the “branch” he/she intends to work on. This is good for quick fixes, but is not suitable for development branch as it will be difficult to keep track which “branch” is doing what. I am unsure if it is one of the intended way to use Mercurial.
Conclusion on Branching
In my opinion, Git’s branch workflow is better, as it is more consistent (i.e. there is only one way to do it). If I were to use Mercurial, though, I would probably use the named-branch workflow as it is much more manageable than all the other Mercurial branch workflow.
One may argue that Git also has some divergence in terms of branch workflow, namely "to merge or torebase". In my opinion, it is actually what makes Git great; you have the option whether to preserve history as it is or to make a cleaner, nice-looking history. In contrast, Mercurial’s different branch workflows are not really “options” but rather inconsistency on Mercurial’s default development workflow. I mean, I can’t really think of the benefit of using the clone-branch workflow, or bookmark-branch workflow over any of the other options. But then again, maybe I have not used Mercurial enough to discover the different benefits and disadvantage of the different ways of branching in Mercurial.
Just to reiterate, I wrote a comparison of two of the most popular distributed version control systems in terms of their attitudes towards history, commit workflow, and branching. I found that Git’s way of doing things to be better than that of Mercurial’s because of the flexibility and consistency that Git provides.
Feel free to point out any mistakes in my post. I have not used Mercurial for quite a while so probably some information is outdated, but I did some research before posting this so it should not be too outdated.
Other references not linked on the post itself:

Friday, March 4, 2016

Git tips and best practices

This post is intended for you developers who have just started using Git, or perhaps have been using it for a while, but have not been using it optimally. Here are some tips to level up your Git mastery; to make your project more manageable and organised.
Note that some of the tips here are in the context of working with Git and Github, but Github can always be replaced with any other repository hosting website like GitlabBitbucket etc.

Another note: if your team already has a Git policy, please do obey them if it is in confict with whatever I have here below. This is by no means is the only correct way to do things, but it is what works best for me so far.
Tips for Novice Users
Always pull (or even better, fetch) before committing locally
This is to prevent too many “Merge remote tracking branch …” commits which are not very descriptive and give more work to people who are investigating commit history , as they need to open the commit to know what changes instead of by just reading the commit message.
Just to give a brief explanation, this happens because the branch in your local repo and the remote repo has diverged. Let’s say the last commit on the branch when you were working on it was A and then you go ahead and add another commit B. However, someone else actually already pushed a commit C to the same branch. Now if you try to push your local changes, the server (eg Github) will reject it because for all it knows, the next commit after A is C, however what you have after A is B, which is inconsistent with what the server has. If you do a git pull, because Git cannot decide which commit should come first before the other, it will just create an extra merge commit. (I will add a diagram to show this more clearly)
fetch is potentially better if you are working on a shared feature branch that might be rebased once in a while. This is to notify you if the branch is being push --forced and you should handle it accordingly (hint: not pull) by either deleting the local branch and checkout the new one, or git reset --hard <remotename>/<branchname>. Make sure you are on the right branch before you do the latter!
Each commit should be as atomic as possible
The most common bad practice of someone who just started off using any version control system is that they think it is just another way of saving and backing up their work to the cloud. While this is not entirely wrong, it leads to weird commit messages as the commit author has not actually finished what he is doing; it was just a commit to “save” his work.
A slightly better bad practice is that they commit only when the work they intended to do is done, and write what they did as the commit message accordingly. However there are more changes in the commit than what is described in the message. It may catch people who investigate commit history off guard because they did not realize some functionalities are incorporated into the branch. It also prevents the use of cherry-pick. Of course, one can use merge in place of cherry-pick but as said earlier, merge commit messages are not very meaningful and so it is better to do cherry-pick.

Commit message is "added eslint" but there are some refactoring too

There are many other benefits of committing atomically; another example is that it makes rebase -imuch easier. If you are still a beginner, you most probably won’t be doing a lot of rebase and cherry-pick (if at all) but your more experienced teammates will thank you for this, trust me.
If you are collaborating on a shared repo: always create a feature branch
No matter how small the team is, how small the project is, how small the changes you intended to make;master branch should never be touched except for merging from feature branches or syncing with upstream repo (if you are forking another repo).
Aliases
Sometimes writing git commands that is relatively long (such as checkout, or log with some prettify options, etc) is just plain annoying, especially when we just want to get it done ASAP, otherwise we lose our train of thoughts. Git alias will allow you to do just that.
To add an alias to those long commands (or simple commonly used commands that you are lazy to write in full), you can go to your global .gitconfig, add a [alias] section, and add the aliases that you’d like to use accordingly. The file is located in different places in different OS; C:\Users\<User Account Name> on Windows, ~/ on Unix (probably the same on Mac OS).Alternatively, if you are lazy to find it in your file explorer, `git config --global -e` will open up the file using your default text editor.

Adding alias to .gitconfig

Push only the branch you are currently at
If you find yourself pushing to branches you did not intend to push, you probably installed your Git quite some time ago. To set push to only push the branch you are currently at (instead of all remote-tracking branches) change the push.default config to simple/upstream/current. For more info on each config options look here.

Tips for more Advanced Users
git rebase -i before push and/or submitting a Pull Request/merging to master
If you have already been doing the good Git practices in the Beginner’s section, this will bring you up to the next level.
In the course of developing your feature branch, it is very rare that you will have a very nice commit history, as a lot of new feature will involve trials and errors. These failed attempts, however, are usually not useful to be stored in the commit history. One way to get rid of the failed-attempt commits is to userebase --interactive or rebase -i for short. There are quite a number of good resources covering that already (this, for example) so I do not intend to cover that again here.
Note that it is best to do this if you have not pushed your feature branch to remote, as someone else who pulled the feature branch will need to create the not-very-meaningful “merge remote tracking branch…” commit, if that other person did a pull instead of a fetch.
git push --force-with-lease
If you are an advanced user, most probably you are quite familiar with rebase -i above, and probably you know that you need to do push --force to replace whatever that is on remote with what you have locally. However, if you someone else happen to push to the branch and you do push --forceafterwards, that person’s work will be overwritten by your branch which does not have that commit yet.
There are many ways to solve this, but it is better to prevent it altogether, so introducing: git push --force-with-lease. What it did is basically checks if the branch is exactly the same as what the one whopush -f expected, i.e. no extra commit from other people. It might be a good idea to set this as an alias as --force-with-lease is quite a mouthful (or a handful?) to write.
That is all for now. This post might be updated in the future (one that is in my backlog is reflog) so do check back once in a while.